Monday, July 25, 2011

11 days in!

Hi all!
We're back with another updated of the "D's Outdoor Living Makeover!" project:

We are now 11 days into the project and this is what the worksite is looking like:
Not too shabby!

Just for a little perspective, here's what the worksite looked like a mere 11 days ago:
Big difference already!

So what's been accomplished since our last update?

Well, as you can see, the moldings are now in place that surround the wooden beams and posts as well as those that 'finish' the edges of the footing holes in the patio.


Remember how the beams and posts looked like this last week?

Also, as you can see in the picture below, we've stealthily 'hidden' the electric line in one of the posts:
We'll show you why we decided to do that when everything is all done!

We've still got a lot of work to do on the pergola before we start on the kitchen. Jamie, our stellar carpenter, will be sweating here at the worksite (it has been ridiculously hot here in Richmond!) for a little longer:

Back in a few for some more progress reports!

Wednesday, July 20, 2011

Week 2: Starting the Vertical

Hi all!

Back with exciting news from 'The D's Outdoor Living Makeover!' Project:

Here's a quick re-cap of what's happened thus far: The D's have decided to transform their back yard into an outdoor living oasis! We've designed and begun to install a patio/trellis/outdoor kitchen area for them that will provide them with an all-inclusive outdoor space. (For details see here, here, and here.)

So when we last checked in, the project area had gone from looking like this on Monday:
To looking like this on Friday:

Since then, though, we've made some exciting progress!

First, Dionicio, Jesus, and Jose M. were able cut and install the triangular- shaped pieces of paver to fill the spaces between the soldier course and the 45-degree patio pattern:

This step took a great deal of painstaking measuring, re-measuring (what's that old addage? 'measure once, cut twice'?) and very careful cutting. All the attention to detail paid off, though! The patio looks beautiful!

As you can see in the photo above, we've left some special electrical sleeves that will eventually provide power to the outdoor kitchen. (Remember our planning from here?)

*In this case we knew about the need for electricity before the installation of the patio, but we find that it's always a good idea to leave sleeves for any potential future work when installing a hardscape. That way, if the homeowner decides later that they would like outdoor lighting or irrigation, the installation process for those elements are significantly easier and less destructive to the existing landscape!

So now that the patio is installed, we've moved on to the trellis!
Here's what the structure is looking like right now:

You can see we've got the vertical posts installed as well as 2 of the 4 horizontal beams.
Right now the diagonal scaffolding-like pieces are supporting the structure in place as the posts cure in the handy footings we constructed:

You can't see the footing construction anymore because we laid pavers over the footing sites for a seemless effect (the area with the re-bar will be cleaned up once the trellis is finished up!):


Can you almost imagine how this is going to come together!?

Back soon with more trellis progress!

Has anyone ever installed a trellis? Anyone else out there lusting after such a beautiful outdoor living feature?

Friday, July 15, 2011

Progress Report: The end of the week

It's Friday, and we're back with another 'The D's Outdoor Living Makeover' progress report! A lot has happened since our last update!

Once we got the grade set just right and the footings poured (see those details here) it was time to prepare the base for the patio.

Many, many yards of crush and run stone went into this process, and our plate compactor and skid steer were the all-star tools of the day!


Basically, in order to set a strong, stable base for a patio, we like to lay geo-textile fabric and add several inches of sand and then several inches of compacted stone in order to stabilize the pavers and prevent patio warping from tree roots or freeze-thaw cycles. To create the stone part of the base we alternate spreading a layer of stone and compacting the base until we have built up to the desired depth. It's also important to note that we like to prepare an area a bit larger than the size of the patio so that we have several feet of stable soil/sand/stone material on all outside edges of the patio as well. We finish the look by feathering this part of the base into the existing grade of the yard and covering it with some quality topsoil to allow for sod or seed to make a seamless transition from the patio into the yard. (This approach also allows for excellent drainage off the patio and away from the house.)

So during the base preparation portion, the work area went from looking like this:

To looking like this by mid-day on Wednesday:

Here are some action shots of this process:


Notice that we bring the stone and sand over to the work site bucket by bucket using the skid steer. Though the process of moving materials is tedious, it is necessary as the trucks that deliver the material can get no closer to the work area. Thank goodness for the skid steer!

By the end of the day Wednesday, the base was nearly prepared, the electric sleeves were in, the footings were curing, and everything was ready for Thursday: Paver Day!

Here's a quick peek at the materials we used for the patio:

We had 6 palettes of these beige beauts delivered to the site.

Dionicio, Jose M and Jesus spent all day Thursday laying out the soldier course (edging) on the deck side of the patio as well as the 'meat and potatoes' of the patio which sits at a 45 degree angle from the soldier course- a really beautiful effect! At the end of the day Thursday, this is what we were looking at:


Beautiful, huh? It's amazing how quickly things begin to take shape once the pavers go in!
Also, notice how those black footings are now at grade- we actually built the grade up to be flush with the top of each of these. (We had placed them at varying heights based on the desired grade.)

So, with the pattern in place, the crew spent most of the day today (Friday) using a string line to meticulously check the angles on each row of pavers. It might seem overly cautious to check every paver row for precise angle measurements, but if one row gets even slightly off, the effect is compounded by every row after it, leaving a really evident flaw in the pattern of the overall patio.

So for a few hours. Dionicio and Jesus pulled string while Jose shifted, hammered, and wiggled pavers until the lines were just right. It's all about the details!


Once the lines were right, it was time to begin measuring for the cuts that needed to be made to the pavers to fill the gaps between the soldier course and the 45 degree pavers:
(Don't worry- we fixed that one on the end!)

At this point we've wrapped up week 1 of 'The D's Outdoor Living Makeover!'

What's next?
We'll be posting next week as we start the pergola installation, finish up the patio and begin working on the kitchen. Exciting things to come! Stay tuned!

Tuesday, July 12, 2011

Progress Report 1: 1.5 Days in!

It's lunchtime on day 2 of 'The D's Outdoor Living Makeover' and we've got some progress for you!

For those of you who missed yesterday's post, here's a quick recap:

Our clients, 'The D's' want to transform their back deck area into an all-inclusive outdoor living area, and after weeks of planning for the project we broke ground yesterday! Over the next 2 weeks we'll be keeping you posted on all of the exciting progress!

So at the start of the project, the space looked like this:

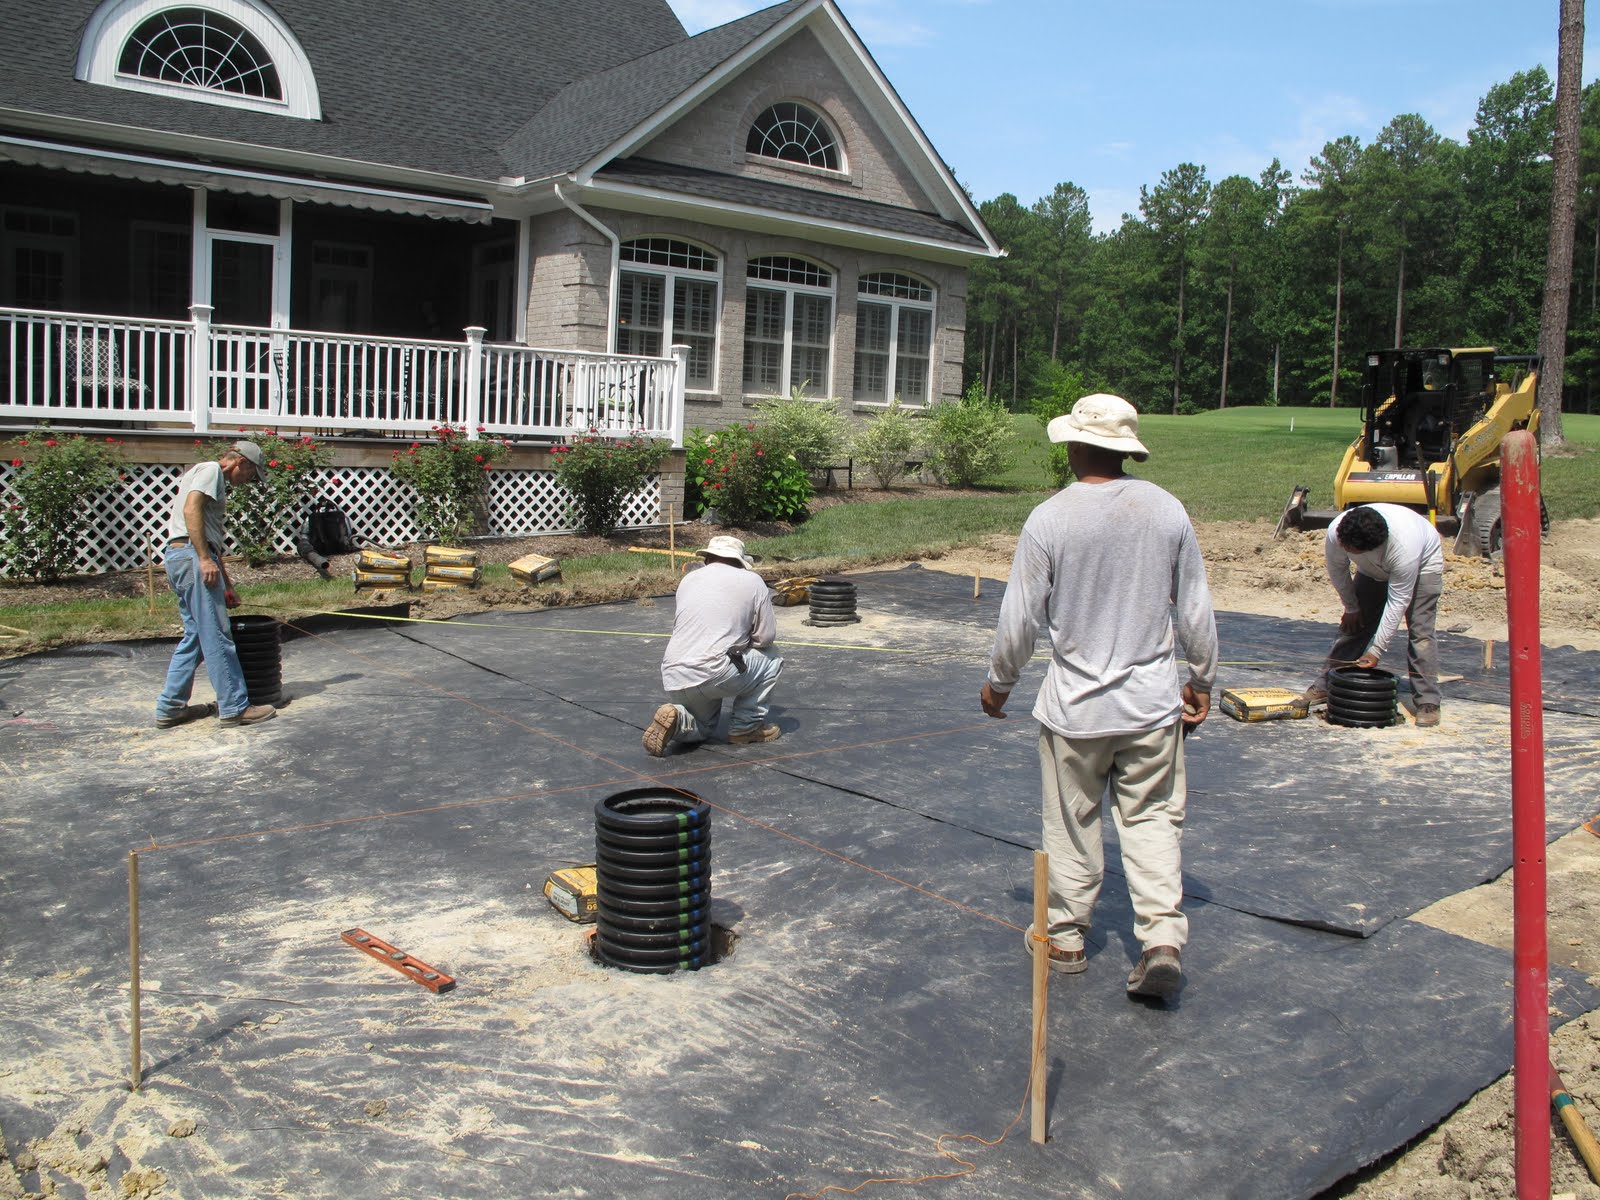
Right now it's looking like this:

Different, huh? As for the progress of what we've done so far, we like lists over here, so we'll show you in list form what we've crossed off thus far:

Day 1:
-Excavate patio/kitchen/pergola area to prepare for patio base
-Compact excavated area with plate compactor and hand tamper to leave a smooth, hard base
-Lay and pin geotextile fabric over compacted area
-Measure out rough grading for patio to include slope that allows for proper drainage
-Measure and mark locations for 4 trellis posts
-Dig 4 footings for trellis posts in patio area
-Insert form for trellis footings into holes

Day 2:
-Perfect the rough grade to be guide for patio construction
-Plan out location for electrical lines (so that the outdoor kitchen will have power!)
-Trench and lay sleeve for electric line
-Pour concrete around trellis footing forms
-Pour concrete into trellis footing forms and set re-bar
-Roughly lay crushed stone base for patio


So, as you can see, we're making some progress! Day 1 went pretty smoothly! We accomplished what we had planned and left the site at a good stopping point to pick up again this morning.
Day 2 (today) has been a little bit slow-going...


Tom, Dionicio, Jesus and Jose M. spent most of the morning working on perfecting the grade. 'All morning' was a bit longer than we had planned to spend on grade-measuring, but in all honesty, folks, this is one of the most important steps! If the foundation of the project isn't just right, the whole project will be off. So we gladly spent extra time measuring, re-measuring, adjusting strings (by quarter inches, literally!) and re-measuring again until the guide strings for the grade were just right.
Here's proof:

Once the string lines for the grade were set, the guys were able to really gauge where the posts for the pergola are going to be set.
Because the pergola will sit on the patio, above the kitchen, designing the footings for the structure took some thought. This is a preliminary visual of the idea Tom came up with:
For a brief synopsis: these cylinders will be cemented (concreted, really) into the holes in which they rest. They will then be filled with concrete to a pre-determined height and a piece of re-bar will be set into the concrete. After some fancy carpentry, the re-bar will drive into the pergola post and, viola!(More on that once we start the pergola construction!)

So, to prepare for the concrete pouring, Dionicio and Tom used the guide strings to determine the exact location for the placement of the re-bar, and Jose M. and Jesus poured the concrete (making sure, of course, not to ruin the string lines!)

*Side Note: We did have to move the cylinders a little, too. Again, by just inches, but the foundation must be right!


Then it was time to rough out the area for the kitchen so we could plan for the electricity:
The orange lines are the future grill/kitchen area! You can see it right?

Next comes the roughing of the electricity lines:

Tom and Dionicio did some hands-on figuring here but did get a plan laid out.
Which brings us to lunch!
Let's see what we can get done this afternoon?
We'll be back tomorrow with more updates- stay tuned!

Monday, July 11, 2011

Let the Installation Begin!

This week we've got an exciting project installation here at Robbins Landscaping!

Our clients, 'The D's' recently decided to expand their back deck into an all-inclusive outdoor living area! And we start installation today!

This week and next we'll be keeping you updated with exciting play-by-play posts of the work we're doing.

Let's start with the BEFORE:

This is what the back deck currently looks like:

It's a beautiful back deck, but it's missing some great entertaining space, shade, and an area for grilling.

Enter Robbins Landscaping. Together with The D's, Doug and Tom have come up with a wonderful plan that will give The D's the lifestyle they are looking for right in their own backyard!

Here's how we plan to deliver:
1. Lacking space for entertaining: we'll be adding a nice, large patio to the area to allow for dining/relaxing furniture.
2. Lack of shade: in comes a beautiful pergola for the space that adds shade and compliments the architecture of the home.
3. Area for grilling: We are so excited to be adding an outdoor kitchen to this space! (We really enjoy designing and building outdoor kitchens because each is challenging, unique, and FUN! And, most importantly, our clients that choose to install outdoor kitchens end up loving them. Outdoor kitchens are great additions to outdoor spaces and really can help achieve a more relaxing lifestyle. And you know how we strive to make our clients happy!)

So, with the aims in mind, let's talk pre-installation details.

This is the space in which we will be working:
You can see it is bordered by an island bed of crape myrtles and flowers on the left and the porch on the right.

Here's a head-on view of the space with the island bed:

Here's a good shot of one of the challenges on the project; those green circular structures in the bottom left corner are septic system components. We'll post on how we worked with those!:

And lastly, a few of our preliminary markings! Doug and Tom like to paint a rough sketch of our ideas on the ground for our clients so that it's easy to envision what we will be doing:

Now that you're caught up, 'Let the installation begin!'

We'll be back tomorrow with progress to date! Join us!

Has anyone ever decided that a back deck just wasn't enough space for your outdoor living style? Anyone drooling over the idea of an outdoor kitchen?